Thursday, September 30, 2010

X200 shunting its train


The scene slowly develops as details are added. In some cases only temporarily. Here we see the X200 bringing its short train to feed the local industries. Of course business is a bit slow at the moment as none of the industries have any structures yet :>)

Monday, September 27, 2010

New siding


Currently no space can be found to accommodate the existing shelving and that needed to extend the layout around the garage walls. I decided the loop may have to be placed on the outside. So, the point that was put in place to continue the loop inside at the northern end has been extended into another siding. This will provide some space for extra locations to spot goods vehicles and will add some much needed variety. Basic scenicing has been commenced in this area.

Friday, September 24, 2010

Electrickery

The wiring was completed at the same time as the track was laid. All points are operated by a slide switch and the frog polarity is controlled by the same device. All tracks are bonded to a wire bus located under the front of the boards. Control is DCC ( Digitrax Zephyr) and I have installed a throttle bus with several outlets available along the length of the layout. As the rains have returned after a very short pause I have taken to building some more track at my workbench inside ready for installation. My usual construction methods may be a little on the fragile side for use outdoors so I still have a decision to be made in that area. The most obvious and well tested track outdoors is Peco but I would like to only purchase one type of rtr track for use both indoors and out. It's a pity I wasn't modelling British prototype as their code 124 bullhead would be ideal.
Structures and ground cover are moving up the list of necessary jobs to be done.

Thursday, September 23, 2010

Ballasting


I thought a bit of ballast would not go astray down one end. Given the shed has dried out a bit and the sun is shining I hit it with some spray can grey and some reclaimed ballast from the HO and S gauge layouts; a mixture of Chuck's and my sieved dirt. It will need some more work to finish it but at least the pc board sleepers blend in without any real effort required.

Tuesday, September 21, 2010

Trackwork


Only a couple of feet of siding to be now installed and scenicing can commence. At least a train can now shuffle up and down. Despite wading in water for most of the day the bulk of the trackwork has been completed.

Saturday, September 18, 2010

Points and Flextrack


A rainy weekend with only a few hours of sunshine to enable some much needed lawn maintenance has resulted in some much needed track construction accomplished.
Being penny wise I have managed to reuse much of the rail from former layouts once again. Mind you, the poor old code 100 is looking a bit wobbly after many ups and downs.
Still, I now have enough points for the baseboards as is and have some of the home made 'flex' track under way. I also had use of a Fast Tracks point filing jig and I did find it much easier to file the point blades and frog to a consistent angle.

Wednesday, September 15, 2010

layout under way


I gritted my teeth and dismantled the HO layout yesterday. I have cleaned up some of the boards and have one wall with baseboards down to accommodate a small shunting yard. This is almost the exact same place occupied by my first 0 gauge layout in this garage over 20 years ago. Soon some more track construction will need to take place once again.

Monday, September 13, 2010

CV and S on wheels


These part built models were returned to me recently. These were started some time back and given to a friend when I was more involved in S scale. The recipient now has more than enough kits to keep him busy so presented them back. Thus, I have continued on with their construction. The CV is built of styrene and the S wagon from some offcuts of ply out of a skip with card, pop stick and paper details. No interior detail and top lips as it is to be tarped. So far I have added the strapping to the side of the S and the roof to the CV. Solebars, W irons, wheels and couplers were next. Both are mounted on GME W irons with a mixture of Slaters and Peco wheels.

Sometimes things happen we are not aware of. The S wagon was placed in the window sill while the epoxied W irons were left to set in a spacing jig. It seems when I drew the curtains shortly after, I brushed against them skewing the setting. So I now have a crabbing S wagon. Fortunately the vertical alignment remained in place and it doesn't rock when placed on a flat surface. A job for another day...... cost of each of these wagons will be less than $40.

Bogies


I have begun to build the stock of bogies up for future models. I have converted a 3-rail Col Shepherd bogie. I converted the wheels using my cut axle method. This requires an insulated stretcher. I insulated the stretcher by replacing the metal screw on one side with a 3mm plastic one and a fibre insulator garnered from my transistor insulating supplies. Perhaps the addition of some brake shoes will help to tart these up a little more.

Thursday, September 9, 2010

Lima O gauged


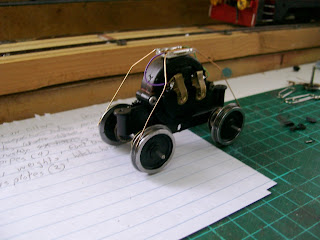
Here is the same idea perpetrated on a Lima mechanism (courtesy of a NSW 44 class). It might get to power a railmotor.

Wednesday, September 1, 2010

Motor replacement


The Hornby mech proved to be very noisy. I traced the source to a loose ringfield magnet. Unfortunately one of the plastic clips that hold it all together expired as I disassembled it. Rather than drill and tap a new fixing I decided to try one of my collection of CD loading motors I have saved over the years. It fitted to the Hornby case by use of 10BA bolts and some larger washers. The fitting of the Hornby motor gear to the 2mm CD shaft I found less than satisfactory after a couple of attempts to fill with solder and drill so I replaced it with a similar sized plastic one found fitted to another CD motor. It had 2 less teeth, so there will have been a dramatic reduction in the ratio (lessening any possible improvement in low speed smoothness). However the noise level is now satisfactory. These CD loading motors have the advantage of being very cheap (all mine were salvaged) but they are still only 3 pole straight cut motors designed for nothing more stringent than to run the CD table fully in and fully out so I didn't expect any miracles. The inside of one of these loading motors is shown above.